
Prologue: The Crash
A couple of weeks ago, I learned that my laptop’s processor and motherboard had fried. While this might have come as a shock to some, I can’t say I was surprised.
After all, I had been using that laptop for over four years, pushing it through marathon sessions almost every day. Frankly, it was more of a “when” rather than an “if.” So, when the inevitable finally happened, I decided it was time to build myself a PC.
I spent several exhausting days researching hardware, poring over benchmarks, hunting for compatibility issues, and generally falling down the rabbit hole of PC building. Eventually, after much deliberation, I placed my orders. It was a ton of work, but hey, if it ends with a working PC, I’ll call that a win.
Act I: The Hardware
My goal was to get significantly better performance than my old laptop without blowing my budget. Mission accomplished. Here is the breakdown of the parts I chose:

Now, you might be wondering: “Why on earth did you buy a GT 1030 in 2022?” Excellent question! The short answer is the global chip shortage. My plan was to use it as a placeholder until the GPU market cooled off. Until then, it was the little graphics card that could.
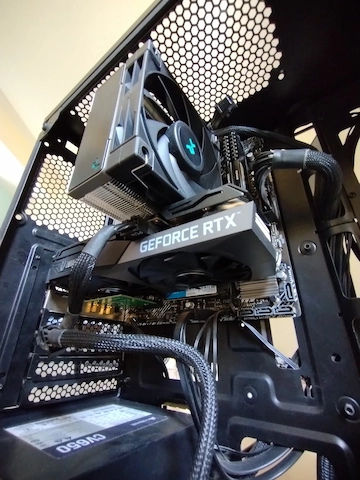
UPDATE: About a year later, I finally upgraded to an RTX 3060 Ti along with a couple of other improvements:
| GPU | ZOTAC GAMING GeForce RTX 3060 Ti Twin Edge OC |
| CPU Cooler | DeepCool AK400 |
| Monitor | Gigabyte G24F 2 |
Act II: The Build
After a week of impatiently tracking shipping updates, my parts finally arrived. This was my first time assembling a PC, so I made sure I was prepared. To my surprise, all I really needed was a Phillips #1 screwdriver. That, and a healthy dose of concentration (plus maybe a little prayer).
I took my time reading through the manuals (yes, I actually read them) and soon enough, everything started coming together; pun absolutely intended.
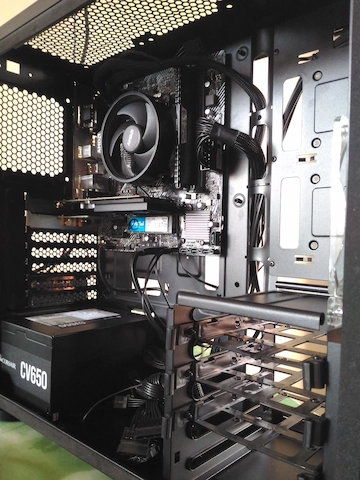 |  |
As it turns out, building a PC is simpler than it sounds. That said, I still managed to have my “oops” moment. Here is what happened:
I installed the AMD heatsink but didn’t notice that the logo projection on one side was blocking a RAM slot. When I tried to remove the heatsink, the thermal paste had basically turned into superglue. Did I look up a solution online? Of course not. I went full Hulk and tried to muscle it off. The result? The CPU came out stuck to the heatsink, even though the motherboard’s CPU lock was still engaged. Miraculously, neither the CPU pins nor the motherboard were damaged. In the end, disaster was narrowly averted, and I lived to tell the tale with all components intact!

Act III: The Verdict
If you ever get the chance, I highly recommend building your own PC. It takes a bit of research and patience, but the sense of accomplishment is absolutely worth it. I’m glad I took the plunge, and my new PC agrees.